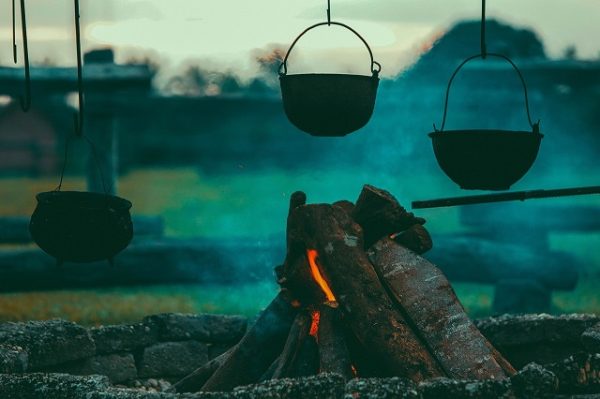
How to Start Doomsday Prepping
Do you want to be more equipped to handle emergencies but are unsure of where to begin or whether you’re doing it correctly? This doomsday prepping checklist for beginners takes you through the fundamentals with sensible, practical, and lifesaving advice. After you’ve read and actioned this checklist, you’ll be equipped to deal with most emergency situations that may arise.
Before you get too far in, know this guide isn’t by some crackpot wearing tin foil on his head worrying about aliens reading his thoughts. I’m just a guy who has seen what devastation this world can throw upon people and how it impacts those who aren’t ready for it. My goal is to ensure you understand all the steps you need to take to start your prepping journey to keep your family safe. You must begin preparing as soon as possible as natural disasters, abrupt layoffs, house invasions, car crashes, extended power outages, or long-term economy and societal decline can strike at any time.
Being prepared needs to be actively managed, not something you do using half measures. Chaos can strike at any time and cause havoc with your life and when it does, a lot of underprepared people panic and try to get ready for the worst-case scenario after it has already happened. If you start trying to prepare after disaster strikes, it is too late.
Prepping can seem overwhelming at times and there is a lot of trash advice out there on the internet and it can sometimes be hard to tell what’s solid advice and what is pure garbage. I want this guide to cut through the noise to become a trusted resource to use for your survival and to make your choices with confidence.
This guide will detail how to start becoming a prepper including prep lists and tips, know that it’s not all about getting as many bullets as possible and hide out in some bunker!
How to Become a Prepper
Knowledge is the fundamental basis of becoming a prepper. It’ll be no use skipping to the checklists, buying all the gear and thinking you have it all sorted without knowing why you are doing it. Take the time to read through this guide to understand the meaning behind what we do and why we do it.
These are the basic steps to follow for prepping:
- How to build a solid prepping foundation.
- Getting your home organized for two weeks of survival.
- Bug-out bags, everything you need to leave home with only a second’s notice.
- Get home emergency bags, preparing for an emergency when you’re not at home.
- Equipping the right gear and learning key survival skills.
- Network and build a prepping community.
It’s not just you!
Know that as a prepper, you’re not alone. For a variety of reasons, millions of individuals are actively getting ready for a future of uncertainty. Perhaps you worry about the state of the country and its economic and political environment. Perhaps you are more concerned about natural disasters that may tear through your town. Or maybe you have made the decision to actively protect your family after you or a loved one experienced an emergency that you weren’t prepared for.
Chances are you already know folks who are getting themselves ready, it’s more common than you realize. The simple fact is there is a certain stigma that some people have for preppers and so many just aren’t open to announcing it to others. At The Survivalist Guides, we aim to demystify the prepper and survivalist space to make it more approachable for your average American.
Common prepper mistakes and how to avoid them
There are plenty of tips and beginner mistakes out there everyone has made however I have found these to be the most common:
- If you don’t practice using your gear or run through your plans, you won’t be ready when the time comes. Don’t just store your equipment and walk away.
- An emergency doesn’t care about the plans you made. Believing that you may either “bug out” or “stay in place” is fraught with danger, you need to be well-prepared to do both when the time is right.
- Don’t go thinking you’ll be in the center of some zombie apocalypse movie or that you’ll be an action hero off to save the world. Keep your prepping practical and realistic.
- As tempting as it may seem, don’t go double dipping with your prep equipment. If you’re planning a camping trip or a hike, don’t go using the gear from your bug out bag. It’s too easy to forget to replace what was used and it wont be there in an emergency.
- Avoid becoming overwhelmed by the preparation. Some areas of this community can send you down a rabbit hole of conspiracy theories that can give you an onset of ‘doomsday depression’. Stay positive and slowly build up your resources without throwing all of your money away on items you won’t need like some anti alien probe kits.
- You don’t need a lot of money to prepare, you can focus and getting second hand items or use more do-it-yourself methods. If you’re on a tight budget, it’s better to purchase fewer high-quality items than cheaper poor quality gear that break down just when you need them.
- Don’t just rush out buying some store-bought prepper kits. Many of them are extremely poor quality and fall apart after their first use. Do your research and find the gear that will work best for you.
- Since you can’t see the future, don’t be biased in your prepping by assuming you know what disaster is on its way. You need to be prepared for all kinds of scenarios.
Step 1: How to build a solid prepping foundation
As a prepping beginner, getting a solid foundation is the first step you take to getting yourself organized. To begin your journey as a prepper, you should start by learning the basics and stocking up on a few essentials, namely:
- water reserves
- food stockpiles
- first aid kits
- hygiene products
- financial stability
- sanitation and hygiene products
These are the first steps every beginner prepper should start with. It may seem overwhelming at first but you don’t have to do everything at once. Prepping is a marathon, not a sprint so a ‘slow grow’ mentality is key so you don’t burn yourself out.
Survivalist Water: best way to store water long term
Water storage should be the highest priority, even over emergency food storage. Your average person can go around 3-5 days without drinking water however it can come with severe and sometimes permanent health issues.
During a disaster, water treatment plants may be out of operation meaning you won’t be getting any water flowing out of your taps. People will be flocking to the stores and water will be flying of the shelves, disappearing in moments. You need to begin your own water stockpile well before this happens to ensure your families wellbeing. The most effective way to do this is to start stocking up on two types of water.
A minimum of two weeks’ worth of clean drinking water should always come first. This entails storing around 14 gallons of water per person (1 gallon per person per day). This is based on the average amount of water that people use each day however you can store more to be on the safe side. The second kind of water you should store is collected rainwater, this is a great way to store large amounts of water for free. You need to the gutters and downpipes you are collecting from remain clean.
It’s crucial to keep in mind that any water you collect needs to be purified before drinking or cooking with it. This can be easily done through boiling the water, the use of a water filter system like the LifeStraw personnel water filter or pills for purifying water. For the best results you can use a combination of these methods.
We recommend not using collected water for drinking or cooking until the water you originally stocked runs out. Reusing collected rainwater to replace flowing water is its second purpose. Rainwater collected, for instance, is excellent for cleaning, watering the garden, laundry, and other home tasks.
Survival foods to stockpile: preppers guide to food storage
In an emergency, food might mean the difference between getting through the situation calmly or in complete panic. After you have sorted out your water needs, the next step is to secure your food (at least two weeks worth). As you get more experienced, you may build a larger stockpile to last for six or even up to twenty-four months.
The more emergency food you have on hand, the longer it will last and you’ll be more prepared. Food for emergencies is available in the form of survival kits, freeze-dried fruits, vegetables, and meats. For survival, knowing how much food to prepare in advance is essential.
If you live in a more rural location with plenty of land, you can begin growing your own garden filed with plenty of fresh fruit and vegetables. This would give you a continually resupplying store of foods so long as you keep the garden maintained. You can also start farming chickens which are easy to look after and provide plenty of eggs.
Depending on factors including age, sex, activity level, and body type, an individual’s daily calorie requirements can vary greatly. It is important to keep your energy levels up in any survival situations so you can perform at your peak. It’s also critical to organize your emergency food supplies according to your household’s nutritional needs. For example, foods strong in protein and energy are particularly useful during a crisis since they provide long-lasting energy and are frequently a good source of vital nutrients. If you have children or teenagers in the family, they usually need more calories as their bodies are still developing.
Prepper first aid kit list: best medical supplies for preppers
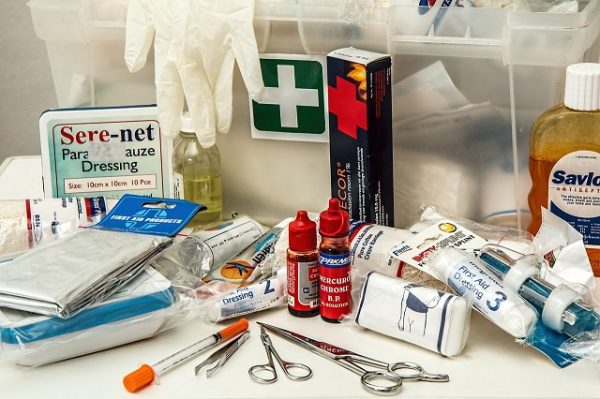
First aid kits are another necessity for all preppers. Hospitals can often become overcrowded during crises like natural disasters leading to longer wait times (if you are able to get seen at all). If you have a first aid kit, you must be able to take care of your injuries on your own or at least prevent them from getting worse while you wait for medical attention. This include being able to splint fractured bones or treat injuries with antibiotic ointment to prevent infection. For a family of 4, the Red Cross has recommended the first aid materials listed below, most of which can be standard in any first aid kit depending on the size you get.
- 2 absorbent compress dressings (5 x 9 inches)
- 25 adhesive bandages (assorted sizes)
- 1 adhesive cloth tape (10 yards x 1 inch)
- 5 antibiotic ointment packets (approximately 1 gram)
- 5 antiseptic wipe packets
- 2 packets of aspirin (81 mg each)
- 1 emergency blanket
- 1 breathing barrier (with one-way valve)
- 1 instant cold compress
- 2 pair of nonlatex gloves (size: large)
- 2 hydrocortisone ointment packets (approximately 1 gram each)
- 1 3 in. gauze roll (roller) bandage
- 1 roller bandage (4 inches wide)
- 5 3 in. x 3 in. sterile gauze pads
- 5 sterile gauze pads (4 x 4 inches)
- Oral thermometer (non-mercury/nonglass)
- 2 triangular bandages
- Tweezers
- Emergency First Aid instructions
Prescription medications are one thing often forgotten about during survival preparation. Keeping an emergency supply of prescription drugs on hand could save your life if you or any family member is dependent on them. Ask your doctor about obtaining an emergency supply of any prescribed drugs.
In addition to gathering the supplies you’ll need, it’s a good idea to also build your first aid skills. It’s likely that seasoned preppers with years of experience already possess the first aid knowledge needed to administer medical care in an emergency. But beginner preppers might not. Because of this, registering for Red Cross basic first aid and CPR training could make the difference when it counts.
Prepper Fitness: How to train your body and mind for survival?
We become sicker and are less able to withstand the physical and mental demands of an emergency due to aging and lifestyle choices. If you have trouble walking upstairs, have some form of addiction, or find it difficult to maintain composure while you are under a lot of stress, it will be extremely difficult for you to survive in an emergency. I won’t be going into all the different physical and mental exercises that are available to train yourself in this article as I believe it may lead us too far off-topic. Just know that you need to get your physical fitness and mindset strategies in order to prepare for action when the time comes.
Financial Prepper: How much cash should I have on hand in an emergency
A startling statistic shows that nearly half of the families in the US will need to use credit cards to cover any unforeseen emergency over $500 as they can’t afford to pay for it in cash. Spending money on equipment or supplies beyond necessities (such as two weeks’ worth of food for your family) can’t and shouldn’t be done without first taking care of your key financial needs, like retirement savings, debt reduction, and an emergency fund.
Remember other financial necessities, such as estate planning, wills, and insurance. Have you got a will in order? Would you like to remain in hospital on life support? What would your family do if you were in a serious accident and were unable to speak?
I’m not an estate planner or financial advisor so I can’t speak of any details on how to set up a will or what insurances to get. Best to speak to a professional for these matters.
Emergency sanitation kit: Emergency Sanitation & Hygienic Supplies
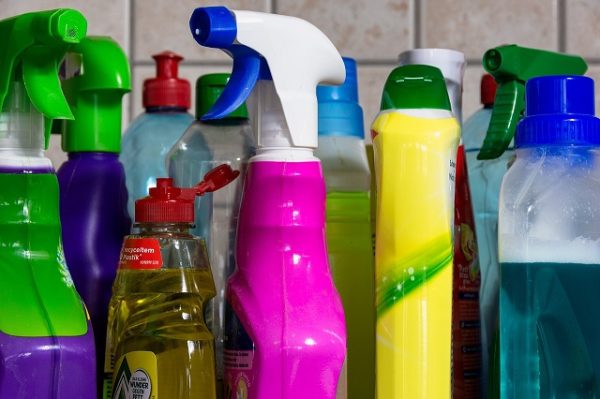
Those who are just starting out should stock up on hygiene and sanitation items which are whatever you use to maintain a clean home or good personal hygiene. Keeping yourself clean during a crisis can help avoid a lot of unnecessary health problems like dysentery and intestinal worms. When water is limited, items like wet wipes and hand sanitizers can be used to stop the spread of such illness and pathogens. Depending on the kind of emergency, shop shelves can become bare certain products may be difficult to get if you leave things too late (remember how hard toilet paper was to get once upon a time).
As a result, you should stock up on any of the items you keep in your bathroom like:
- hand soap
- toothpaste/toothbrushes
- body wash
- shampoo
- feminine hygiene products
- toilet paper
Keeping this supply will help to keep you and your family healthy.
In addition to the above hygiene products, make sure to get plenty of basic cleaning supplies as part of your prepping. Your preparedness survival kit should also have disposable gloves and waste bags in addition to standard cleaning materials. These will support trash management. Maintaining a stock of cleaning supplies is essential to preventing the spread of illness and disease with the cleanliness of your home to help you stay out of crowded hospitals.
Step 2: Getting your home organized for two weeks of survival
Reestablishing daily life after a natural disaster might take weeks or even months. Being self-sufficient in your home for a minimum of two weeks (or even longer) without assistance from others or the grid is your aim. You cannot count on having access to basic things like electricity, water, gas for cooking or heating, internet, communication, 911, ambulances, and so forth.
Basic prepper checklist:
- Water: 14 gallons of drinking water per person (roughly 1 gallon each per day) and set up a rainwater collection system.
- Food: at least 23,000 calories per person (roughly 1,500 calories per day) of long shelf-life food
- Hygiene and sanitation: general cleaning and hygiene items prioritizing items that don’t need running water
- Light: flashlights and headlamps
- Important Documents: copy of birth certificates, passports, deeds, maps, pictures of loved ones
- Medical: a fully stocked first aid kit and any required medication
- Fire: matches, lighters and fire starters
- Communication: a one-way radio or better yet a two-way radio
- Power: Recharges/spare batteries. A solar charger comes in handy if power goes out and you don’t have solar panels installed on your roof
- Hand Tools: shovel, axe, work gloves, zip ties, wrench, etc.
- Cash: a personal preference how how much you want to stash
- Shelter: You may be in your home but a tarp comes in handy to plug holes in your roof if damaged
- Entertainment: cards, board games, books, movies downloaded to a tablet
- Local & emergency contact information: important contact numbers
- Heating and cooling: warm clothes, indoor heaters, extra blankets
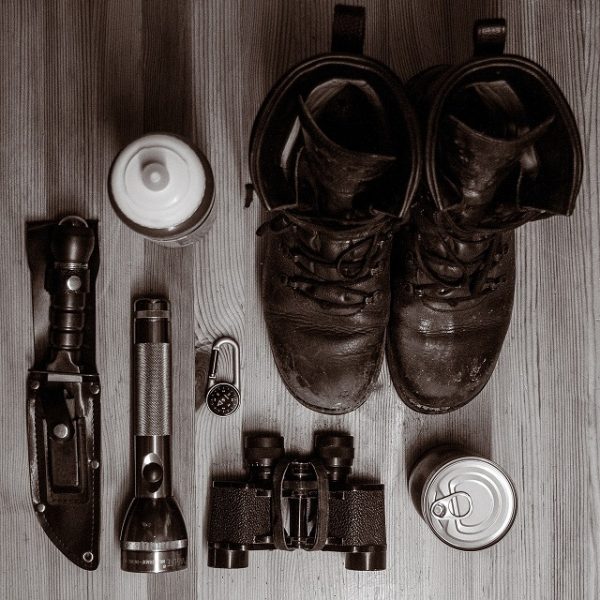
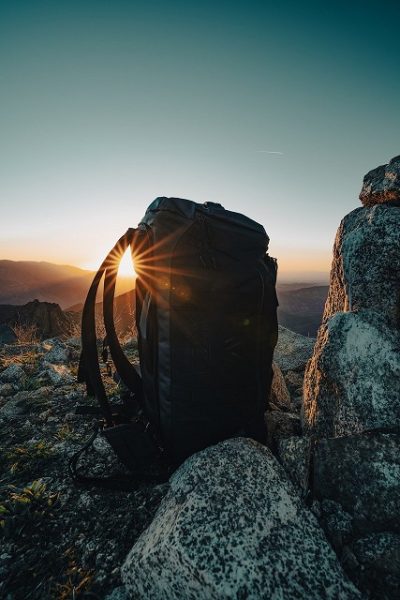
Step 3: Bug out bag essentials – What should be in a survival bag?
In some cases, bugging out or fleeing could be the best course of action. A tornado may an unexpected turn towards your house in a flood-prone location. In this situation, it would be advisable to flee to higher ground and wait out the storm somewhere safer. Alternatively, you may benefit by leaving when everyone else is in a panic to beat the traffic.
You need a Bug-Out Bag (sometimes referred to as BOB or go-bags) in order to prepare yourself to evacuate effectively. A bug-out bag is typically a backpack that is crammed full of various survival essentials that will keep you nourished, hydrated, and more comfortable throughout your evacuation. Your bug out bag is effectively your to-go emergency kit. These backpacks are made to be carried on foot as you can’t always expect to have a car available, this means you need keep the backpack and packing lightweight.
Having just one bug-out bag ready to travel can save lives in a multitude of scenarios, or at the very least makes things a lot easier. A few instances are:
- when authorities issue an evacuation order, you want to leave as soon as possible to avoid the mayhem and traffic bottlenecks while others are rushing to pack.
- you wake up in the middle of the night to discover that your house is in the vicinity of a rapidly spreading wildfire,
- you have to get somewhere quickly (maybe a family member has unexpectedly fallen ill)
Your go-bag contains items to not only help you survive an emergency but to also help you recover afterwards. You should also include copies of insurances and photos of your family.
The difficult aspect is figuring out how to include the widest range of necessities for both survival and recuperation in a single bag. How can you construct that bag to accommodate the greatest number of real-world situations?
As you assemble your bug-out bags, keep these ideas in mind:
- You should keep your bug-out bags somewhere dry and cool like on a shelf in the garage.
- You should have a bug-out bag for each person who can carry one. Once a child reaches the age of 10 or 12, many families construct a separate bag for them, changing the contents as necessary. Every member of the family needs to be aware of the whereabouts of their bug-out bag.
- Selected gear should be travel-sized and lightweight
- Along with other survival supplies, bug-out bags should include a supply of clean drinking water and food that doesn’t need cooking.
Build your own bug out bag using the essentials checklist:
- Water filter straw or water purification tablets x 20-40
- First Aid Kit
- Ready to eat food
- 32 oz hard canteen with water
- Multitool
- Headlamp
- Pocket chainsaw
- Change of clothes
- Jacket
- Flint and steel
- Important Documents (physical and USB thumb drive)
- USB charging cable and wall plug
- Tarp
- One- or two-way radio
- Toilet paper
- Cooking gear
- Li-Ion battery pack
- Storage bags (e.g. Ziploc bags)
- Field knife
- Cash
- Paracord
- Hat
- Condensed soap
- Respirator
Step 4: Everyday Carry Bag – What to carry in your EDC backpack
You can never predict when a catastrophe will occur. What would happen if you were away from home during an emergency? That’s why, wherever you are in the world, being ready is crucial.
Consider the scenario when you are going to leave your house to perform errands and there is an earthquake. You might not be able to get back home for food and equipment in this situation. You’ll be happy that you prepared your car with emergency supplies.
Since you don’t want to be lugging around a large bag in your day to day life, the key is to stock up on the necessary supplies in the places where they naturally fit into your daily routine.
You can prepare a mix of:
- An Everyday carry (EDC) for small items that you can always have with you in a backpack or a purse
- A Get Home Bag (GHB) to keep somewhere you are close to when out of the home for like a work locker or the trunk of your car.
- Automobile accessories. Even with a GHB in your trunk, it’s a good idea to have extra equipment on hand for unexpected car repairs.
Here are some suggestions to think about for your EDC or GHB:
- Include a pair of sneakers or trainers so you can change out of your business shoes, flip flops, etc.
- Always carry an extra set of clothes in case you are stuck in your work clothes.
- Create a communication strategy in advance with your family in case you are unable to return home.
- In the event that your primary route becomes blocked or undrivable, plan for other ways back to your house or bug-out spot.

Main difference between a BOB and GHB:
- In cold climates, only fill water containers about 85% of the way as water expands when it freezes.
- Foods and medications that melt at 100–150 degrees should be avoided as car trunks can get very hot.
- What you can lawfully carry in your BOB at home may not be lawful to keep in a GHB/EDC outside the home if the area has tougher gun restrictions.
Everyday Carry checklist
Since you’ll be carrying EDC items wherever you go, you are limited with how much you can carry. Consider prioritizing the following:
- Phone
- Rechargeable battery pack
- Pocket knife
- Hidden cash and/or credit cards
- Flashlight
- Paracord
- Laminated Emergency details card
- Small first aid kit
- Self-defense items like pepper spray
- Multitool
- Lighter
You are free to arrange these items however you feel most comfortable. Some people like to carry their phone/lighter in their pockets, multitool or pocket knife on their belt, a small flashlight on their keychain, paracord as a wristband, their medical supplies, USB battery, and other items in their backpack or purse. Sometimes you just need to be a little creative.
Step 5: Equipping the right gear and survival skills to learn for beginners
Just storing food, water, and equipment until every available room in your house is crammed with emergency supplies is not how you should be prepping for disaster. Getting the right amount of supplies, being aware of where they are and knowing how to use them effectively are all necessary for being suitably prepared. You also need to keep your gear well maintained so that no matter how long it has been since you began preparing, your supplies are always ready.
In an emergency, you don’t want to depend on a product you’ve never used before. When faced with confusion, your brain can become a bowl of mush. There are far too many cheap and nasty “survival” products out there that break the first time you use them. Or perhaps the food you spent all this time stocking up on doesn’t agree with your stomach.
Now that you have the gear you need, it’s time to start learning how to use it.
Some areas to start on:
Train with your equipment:
- Setting up your tent
- Cooking with camp cooking gear and stove
- Start a vegetable garden
- Learn how to use a map and compass
- Learn how to use your radio
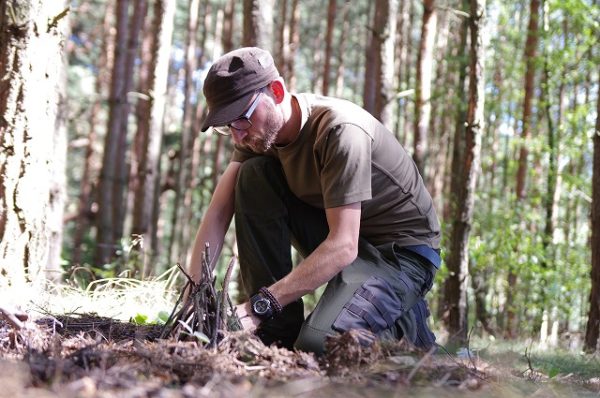
Learn Survival skills:
- Learn how to build a fire
- Trapping, foraging, hunting and fishing techniques
- Cleaning wounds
- Applying stitches
- Collecting and treating water
- Making an impromptu shelter
- Using a tourniquet
Maintain your gear:
- Change out dead batteries
- Store your equipment in a cool dry area
- Learn how to sharpen your blades
- Check food and medication expiration dates and replace as required
- Organize and label your gear
Start a bi-annual review of your gear and supplies, where you audit your supplies and replace an expired items. This is a great time for practice runs with the family.
The mental preparation is one part of being a prepper that is frequently disregarded. It is important to recognize that disasters and emergencies can be emotionally, psychologically, and physically taxing on everyone. How well you can handle an emergency scenario can be greatly affected by mentally and emotionally preparing yourself for the stress.
Step 6: Network and find a prepping community
Getting ready for crises and natural disasters can make you feel alone in the world but that’s completely untrue. As it happens, there is a whole communities and networks of like-minded preppers out there who, like you, are safeguarding their family and staying prepared.
A few traditional preppers out there have a real Lone Wolf attitude, keeping things under wraps and thinking they’d be the only ones walking the wilderness with their loyal dog and their rifle. The internet can be a treasure trove of information these days. There are a ton of useful YouTube channels and blogs like this one that can assist you in starting the preparation process. The prepping community continues to grow with people who choose to collaborate and impart their knowledge to other groups.
It’s best that you don’t want to advertise your preparations to strangers. When an emergency arises, you don’t want others reaping what you sowed. Local training is an excellent opportunity to get to know other like-minded people in your area.
On a Final Note
Congratulations! After reading and acting upon this guide, you are no longer a beginner. It takes time, effort, and a significant financial outlay to continue prepping into the future. However, when you can keep yourself and your safe in the wake of an emergency situation or unanticipated calamity, all the effort you put into the process will be worthwhile.
Your next steps to progress moving forward depends on what you want to achieve, here are some things to keep in mind:
- Extend the period of time they can live in their house without the assistance of the grid. This usually entails renovating the house so it doesn’t require the grid with additions like solar panels and batteries and boosting supplies such as having several months or years’ worth of water and food.
- Research some more advanced equipment.
- Learn how to live off the land by growing your own food through farming or livestock.
- Look into building or buying a bug out vehicle.
- Learn some old school DIY. Learn how to start mending or repairing items, spend time cooking at home and start composting.
- In case you can’t get access to the internet, start building a library of survival guides and books.
- Keep working on your fitness.
- Consider whether you need to buy or build a bug out location
Lastly, keep in mind that survival preparation is a journey rather than a goal. It’s a way of living that requires ongoing education, training, and updating. Therefore, if you don’t immediately understand everything, don’t give up. Everybody has to start somewhere and things will improve with time.